Indoors mural painting: A hobbit summer project
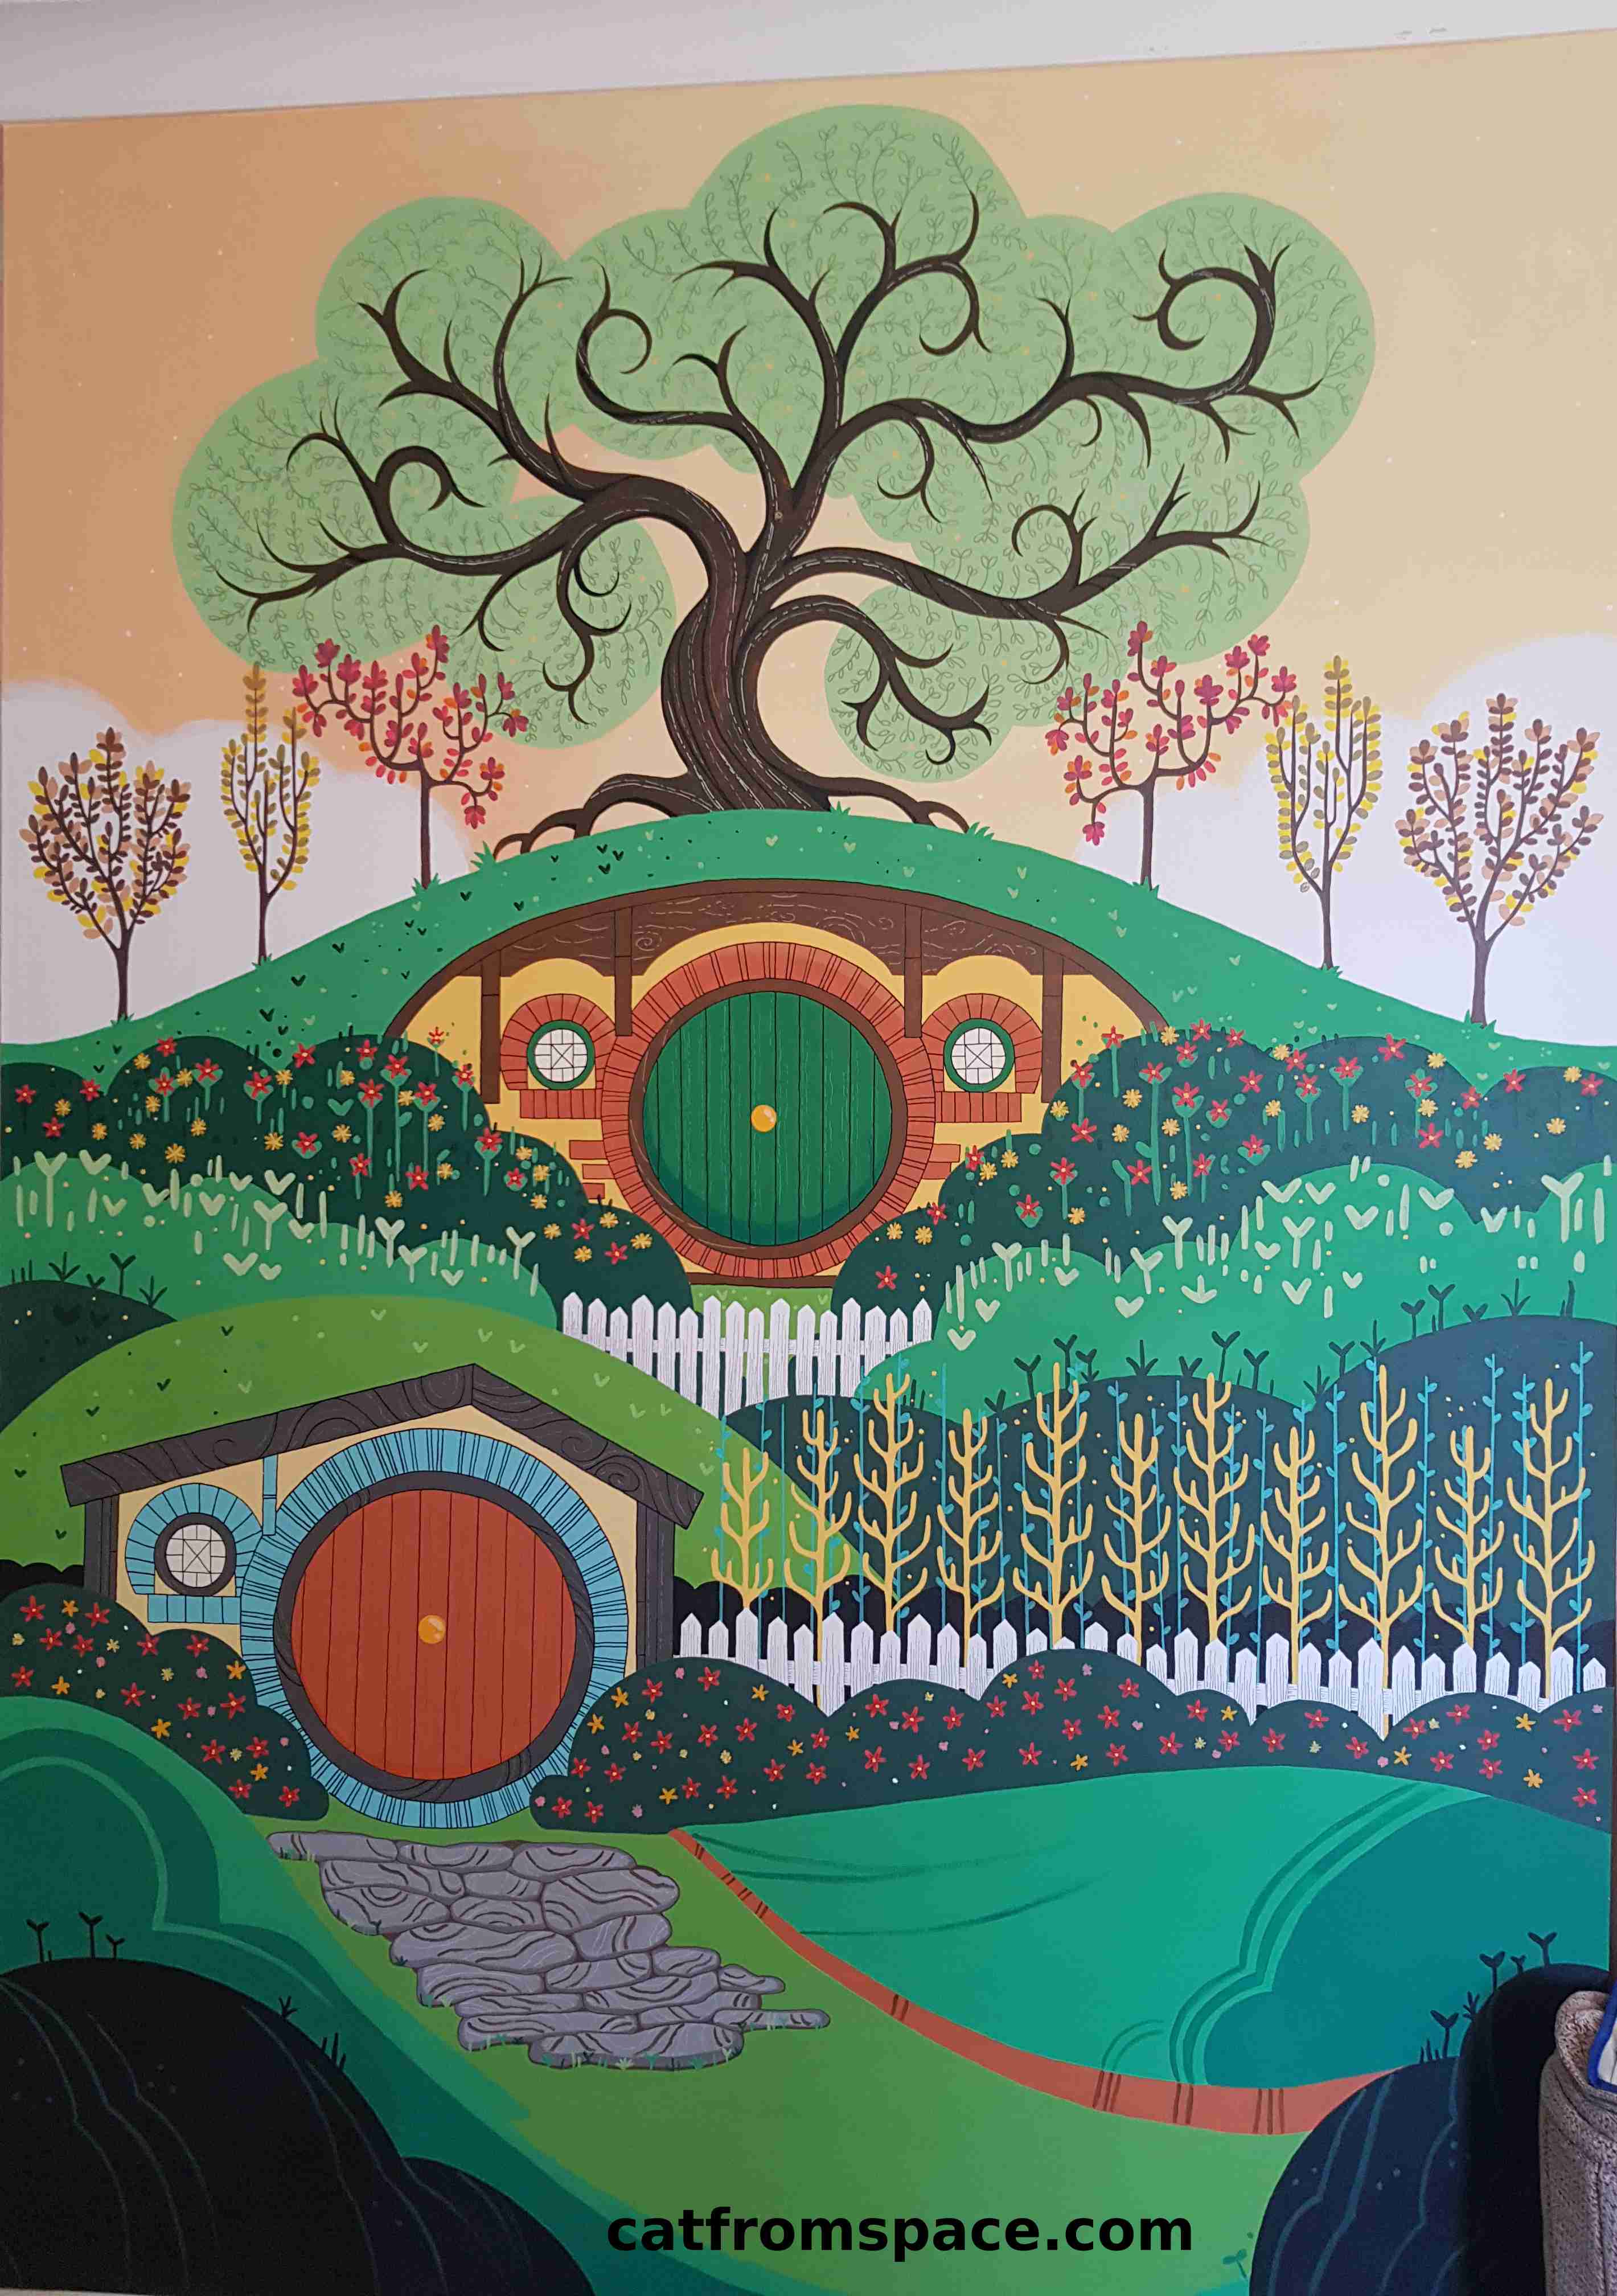
This has been my “little” summer project. Since moving in with my partner to a new flat in January, the empty wall in the living room had been giving me lots of ideas. I wanted to paint something, to make it a home with personality. Then, I saw some fantastic art from Trimcoast and fell in love with it.
I have always liked LOTR a lot, not only because of a wonderful story, but also due to as all the great messages we can see throughout the books: The importance of friendship, how experiences can change someone, the value of simple things, the beauty of nature and that courage can be found in the most unexpected places. I though Hobbiton represented all those things that we wanted to have present in our home.
Shortly after having started outlining the picture, I thought that listening to the LOTR audiobooks while I painted that mural could be even more fun, and I am not going to lie, it was a great idea. So after over eighty hours (over a 4-5 months period) of drawing and painting and having listened to both “The hobbit” and “The lord of the rings” trilogy, I managed to finish, and I am SO happy with the result!.
I found myself having a lot of doubts at the beginning, I wasn’t sure of what the best way to do this project was, and I had to do some asking and experimenting. I also got a lot of very impressed people asking me if I could do something similar at their place. The truth is, anybody could paint a mural with plain colours like this one, even if they don’t think they have the arty skills to do so, as long as they are happy to invest a fair amount of time into it.
Here are some tricks that will make your life much easier if you decide to embark in a mural painting adventure:
-
Use masking tape on all four sides of your mural if it is something that is going to be clearly defined. This will prevent staining the wall around it and potentially prevent having to repaint everything else. Also, make sure you use plastic at the bottom to cover at least half a meter of the floor, because no matter how careful you are with your brushes, the chances of dripping paint are high.
-
Unless you are planning to freehand draw your design from scratch, something that helped me immensely was to borrow a projector from a friend and project the image on the wall. This way, I was able to draw the outline with a pencil directly and saved me a lot of trial and error: drawing, erasing, re-drawing and dealing with scaling the image.
-
If you use art acrylic paints, a project this size can be extremely costly. If you live in the UK, B&Q has wall paint sample pots for around 2-3 pounds with hundreds of different tones they can mix on request. These paints are perfect for large areas and even small details if you have adequate brushes, and will be a lot cheaper.
-
To make the mixes (I bought around 10 different tones of wall paint and created the rest at home), as I was needing relatively large amounts of each colour, I used cheap plastic tupperwares and small plastic sauce-pots from takeaway meals, this way I didn’t need to use all the mix I had made in one go as they would normally keep from drying for a few weeks.
-
Wall paints have the problem of having a fairly different tonality when they are fresh from when they dry out. I found myself having to repaint several areas due to this. Have this in mind if you are mixing paints at home and try to go for a lighter colour than the one you want on your painting. You can also paint a small sample area first to save some paint.
-
Take into account you will need at least two layers of paint for all the large areas, especially if your base wall-paint is very porous. If you do a white base-layer that is non-porous, sometimes you may be able to get away with one layer of paint, but I would still recommend doing two for better results.
-
Acrylic markers saved my life when it came to doing small details. If you have a good hand with brushes, they are not essential, but they will surely save you a lot of time and headaches. Posca acrylic paint pens were the ones recommended to me by a professional mural artist, but since I was a bit tight moneywise, I went for some cheaper ones from Amazon. Sometimes, these would dry out if I didn’t use them in a week or so, but I found that if you wet the tip with water and give them an hour or so, I could usually bring them back to life. Some of the colours didn’t have very good coverage, but it was manageable for what I needed.
-
Using good brushes also makes a huge difference. Believe me, you don’t want brush hairs all over your painting, or brushes that get damaged after using them twice. I decided to go for these brushes in Amazon and was extremely happy to see that their quality was fantastic despite being relatively cheap. You can use normal wall painting brushes for the bigger areas.
I really hope you found these tips useful and that they help you make the decision to personalize your home with some amazing art. Please, do ask any questions you have on the comments!
Disclaimer: I do not receive any commission for any of the products listed in this post, but I think they were decent quality for what I needed and I hope it may save you some time trying to decide what to go for.